Tutorial: Moving back Walls and adding Kerbs
This tutorial will introduce you to some of the different things you can change in an existing track file.
By walking through this tutorial, you will update the Phoenix track in the following ways:
- Change the kerb colors
- Move walls further back
- Add kerbs to a corner
Note: Please backup your F1GP folder before following this tutorial, otherwise you may lose data, and you will definitely alter the Phoenix track.
Start off by loading the track in ArgTrack: Go to the File menu and select Open. Then select F1CT01.DAT (Phoenix) in your F1GP folder.
Changing the kerb colors
Go to “Misc Settings” under “Track Layout” in the tree view menu on the left. Have a look at the various Kerb properties. You can change the type of kerb between having two or three colors, and you can change which colors are used.
Let’s flip the Kerb Type to Triple Color. Now you will see another pair of Kerb Color dropdowns appear.
You can change any of the colors by clicking the dropdown boxes and selecting another color. Remember though, that for the best look you should choose a brighter color for the “Upper” kerb part, and a darker color for the “Lower” part.
Set the colors like this:

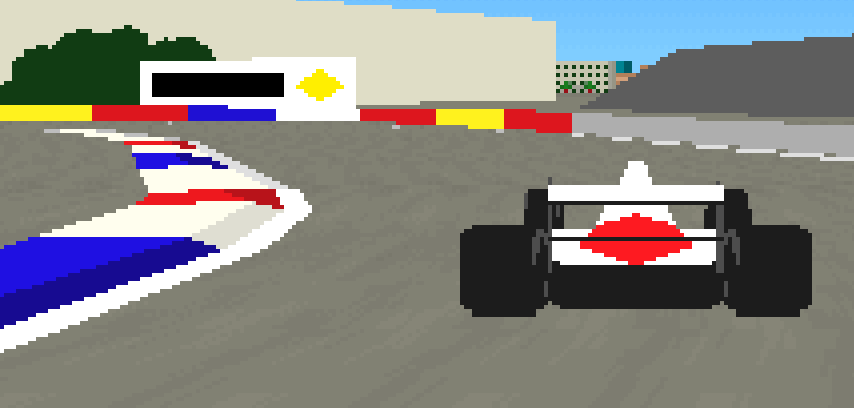
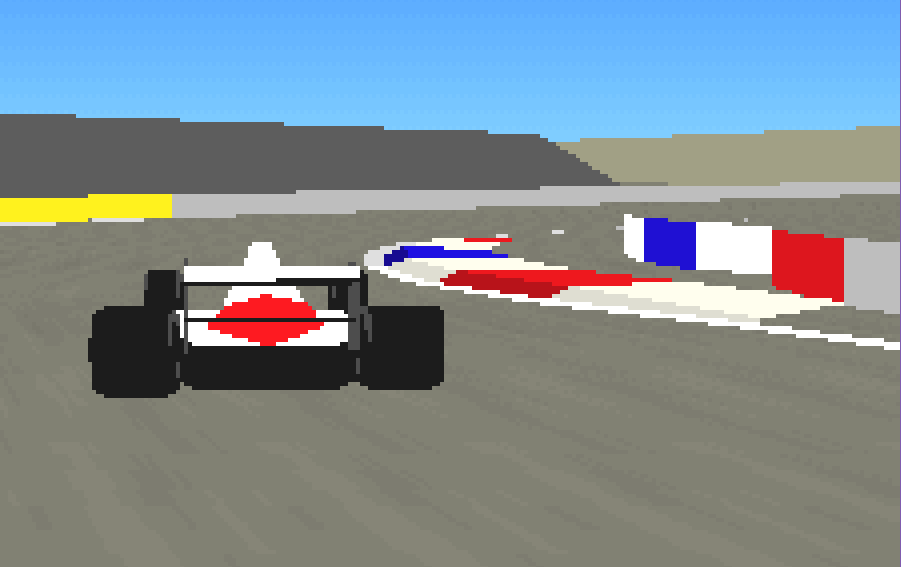
We will now save the track and have a look in-game. If we drive to the far-end of the track, we find the large hairpin. Its kerbs now has three colors.
Moving walls further back
We will now learn how to move walls further back from the track. For this example, we will “open up” the right side at the first corner by moving the walls a bit back.
Go to the first corner’s first section in ArgTrack. This is the first section from the top that has an icon that turns to the right. Double-click the section in the list, and then change the “Verge End Width Right” value to 20.
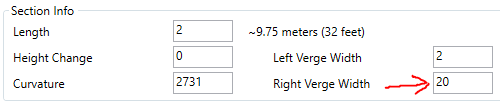
Repeat this step for the next two sections. They are both part of the corner.
Now let’s go in-game and have a look.
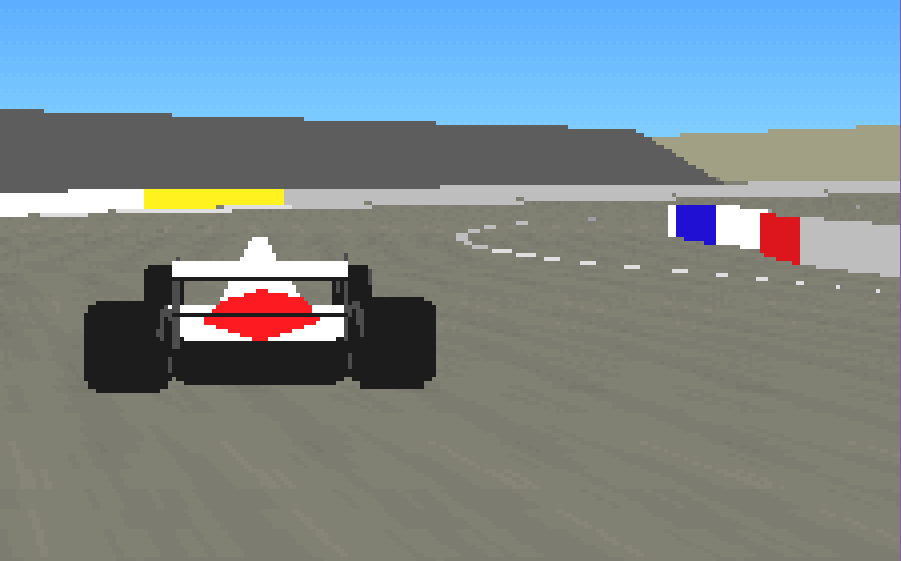
As you can see, the wall has moved back a bit from the track.
Adding kerbs to a corner
Let’s add some kerbs to the first corner.
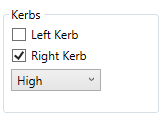
For each of the three sections you just edited, edit them again and check the “Right Kerb” checkbox in the Kerbs groupbox. Let the dropdown say “High”.
Now when we go in-game and drive down to the first corner, it will look like this:
We have kerbs!
Congratulations! You have just performed your first track editing!